Mandibular Full-Arch Implant Placement with Comfortable Guide Tool, Guide Wheel
Dr. Na, Kiwon
Yeonsu Seoul Dental Clinic
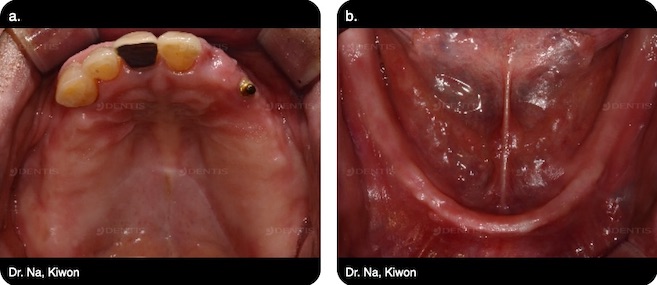
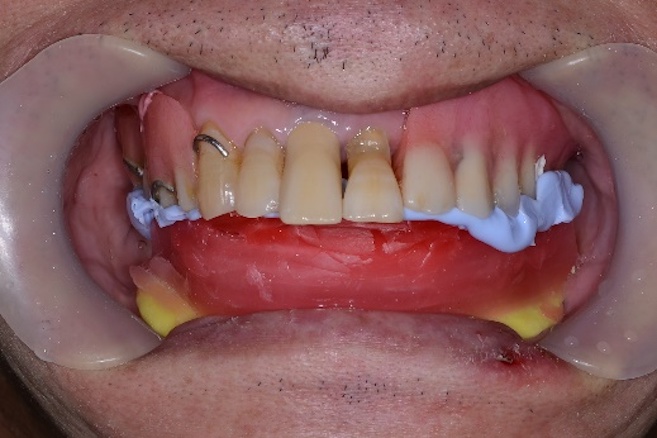
Fig. 1a-b.
Pre-op upper(a) and lower(b) view. A 61 years old male patient felt uncomfortable with his used denture.
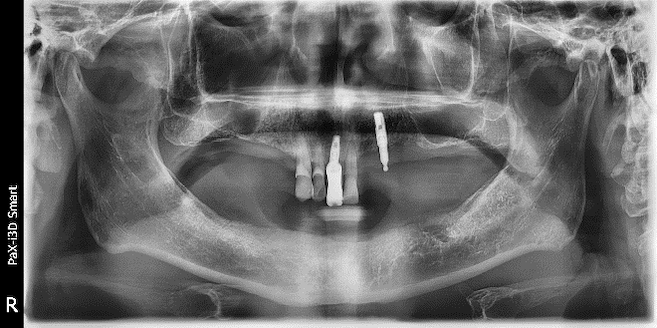
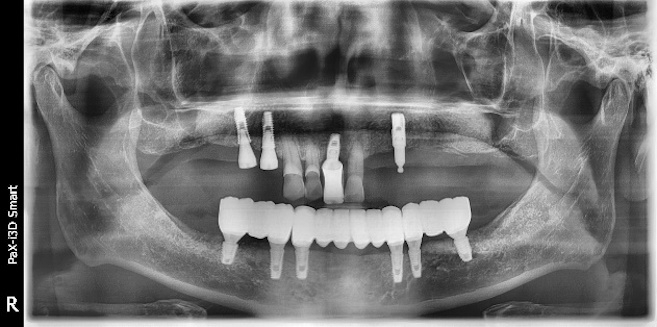
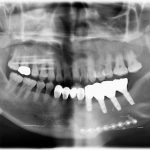
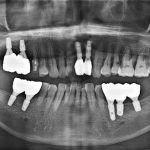
Fig. 2.
Pre-op panorama. The treatment plan was implant placement on #33, #34, #36, #43, #44, #46 with Guide Wheel and GBR and 3-segmented fixed prostheses.
Fig. 3.
Incision and flap elevation.
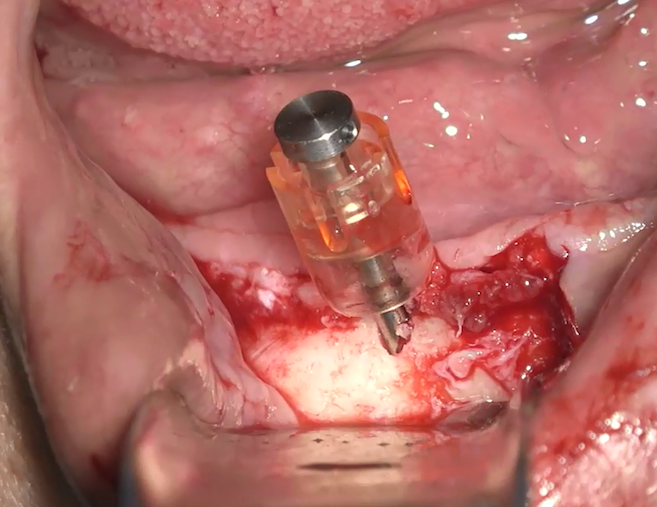
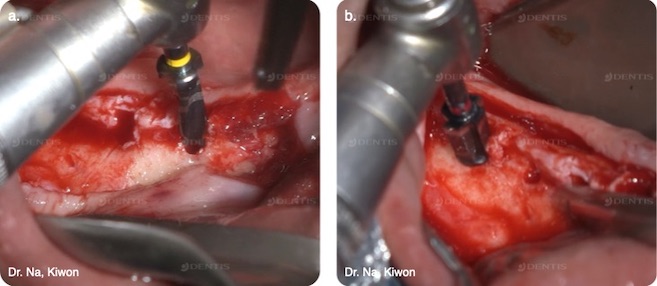
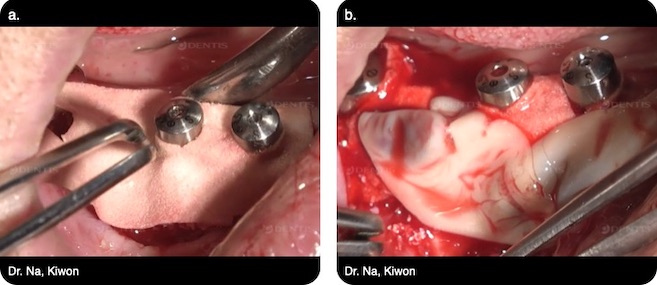
Fig. 4.
After initial drilling on #43, Guide Pole with Ø7.0 Guide Wheel was inserted to the hole to determine the virtual position.
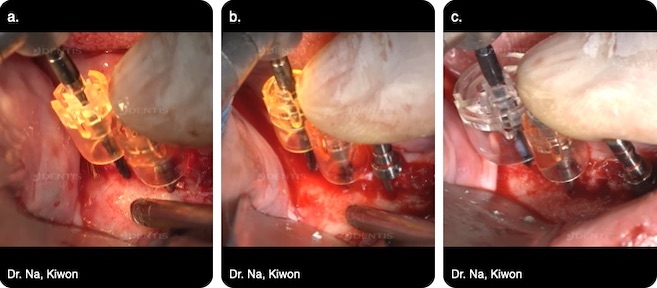
Fig. 5a-c.
Next fixture position was determined with Guide wheels and initial drilling was done. Ø7.0 Guide Wheel was used on #44(a), #45(b), and Ø12.0 Guide Wheel was used on #46(c).
Fig. 6a-b.
Drillings with Straight Twist Drills(a) and Countersink Drill(b) of s-Clean OneQ KIT were done.
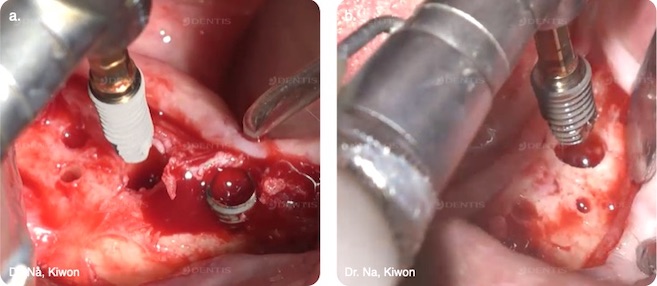
Fig. 7a-b.
OneQ-SL implants were placed on #33, #34, #43, #44(Ø4.2 x 10mm)(a), #36, #46(Ø5.2 x 8mm)(b).
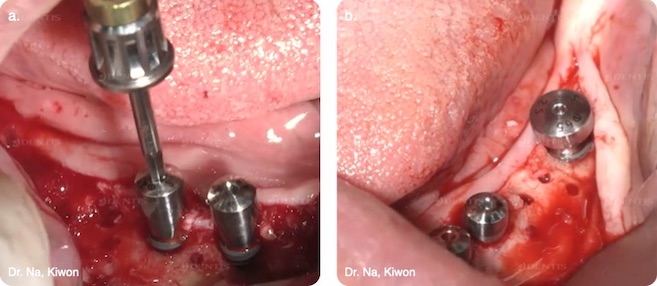
Fig. 8a-b.
Healing Abutments were connected. Ø4.5 x 4.5mm(a) on #33, #34, #43, #44, and Ø6.5 x 4.5mm(b) on #36, #46.
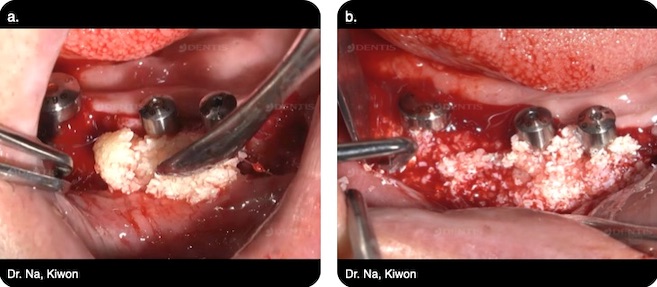
Fig. 9a-b.
GBR was done with Allogenic bone, Ovis ALLO(a) and Xenogenic bone, Ovis XENO(b).
Fig. 10a-b.
Ovis Membrane(a) and PRF(b) were used for covering with bone.
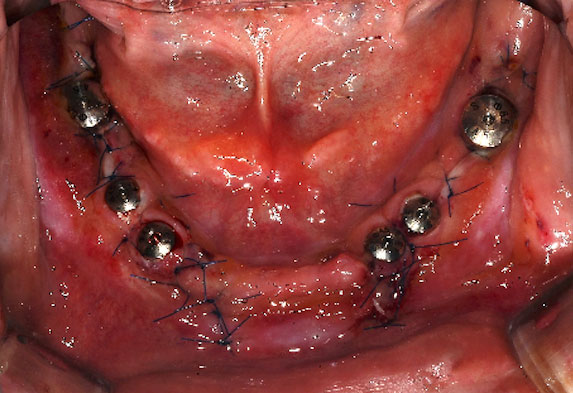
Fig. 11.
Suture was done.
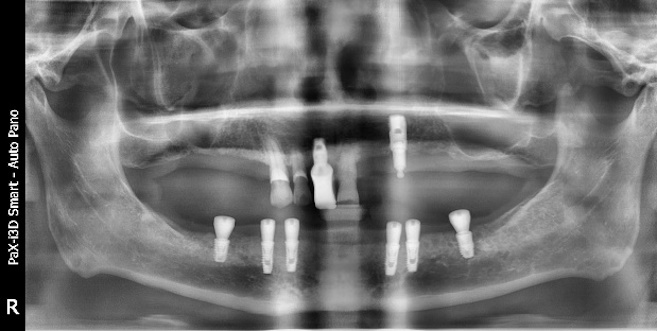
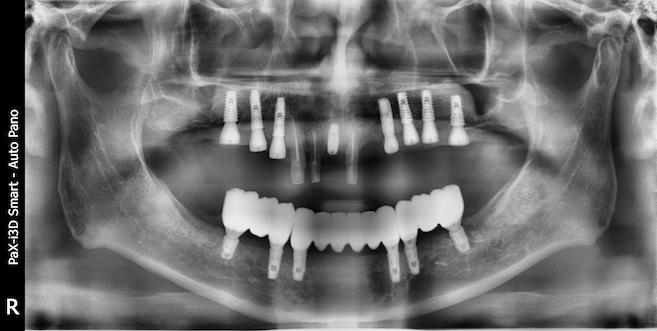
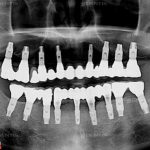
Fig. 12.
Post-op panorama.
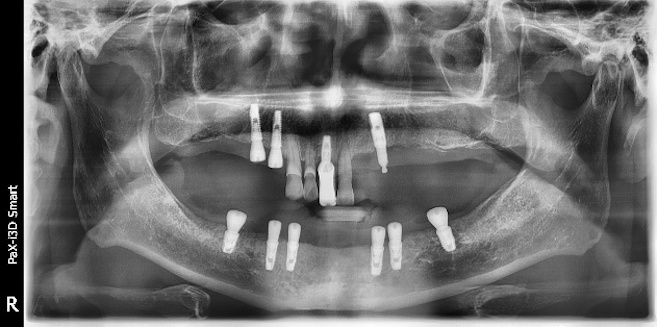
Fig. 13.
Post-op 2 months panorama.
Fig. 14.
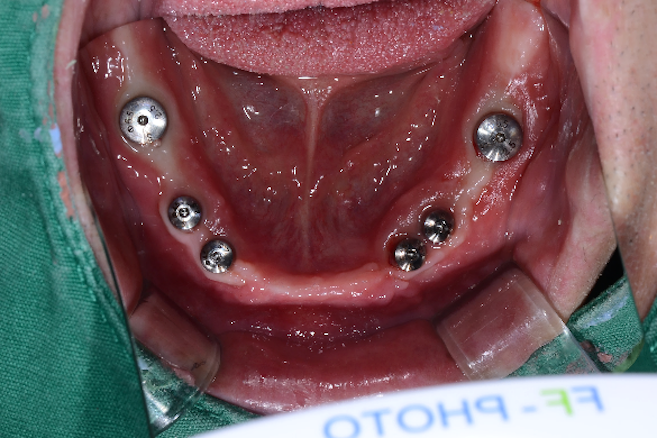
Post-op 3months. Healing Abutments with 2.5mm height(4.5mm -> 2.5mm) were changed.
Fig. 15a-b.
Post-op 3months. Transfer impression was taken for making individual open tray.
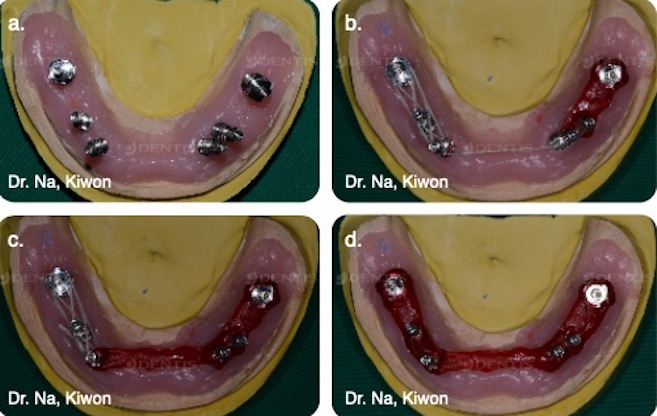
Fig. 16a-d.
Pick-up impression copings were connected on the model(a) and splinted by pattern resin(b, c, d).
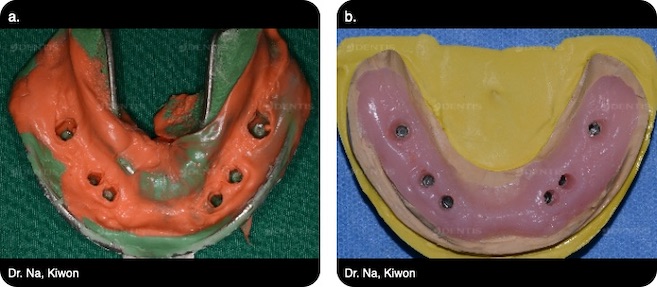
Fig. 17a-b.
Open tray was fabricated with exact screw access holes.
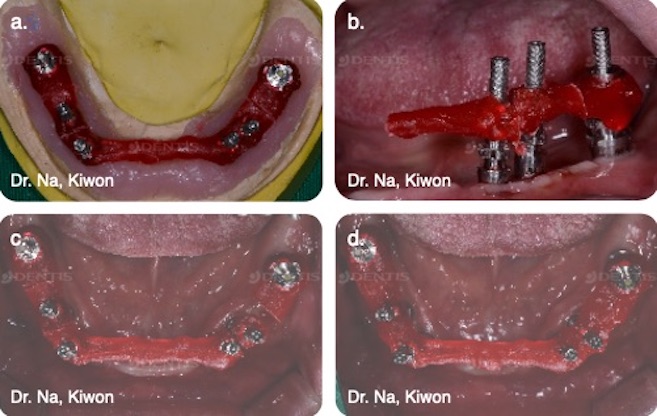
Fig. 18a-d.
Splinted impression copings were separated(a). Each separated pick-up impression coping can be used as verification jig. In this case, Impression error could be found by verification jig and was corrected(b, c). After connecting impression copings, pattern resin was added for splinting in the oral cavity(d).
Fig. 19a-d.
Pick-up impression was taken(a, b, c). Lab analogs were connected to the picked-up impression copings(d).
Fig. 20.
Vertical Dimension was checked with the recording base.
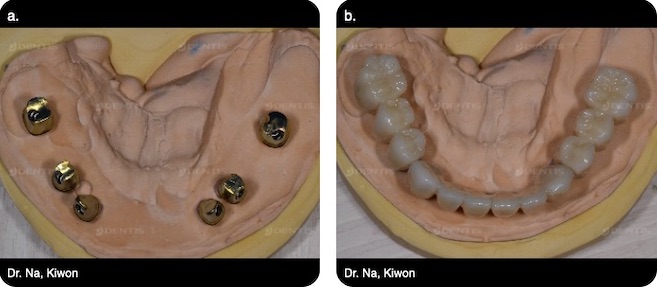
Fig. 21a-b.
Customized Abutments(a) and final prosthesis(b) were fabricated on the master model.
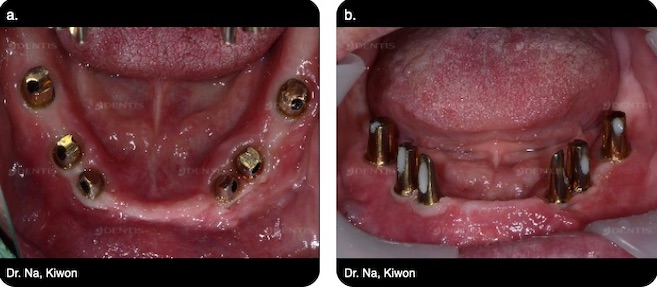
Fig. 22a-b.
Customized Abutments were connected by 30Ncm.
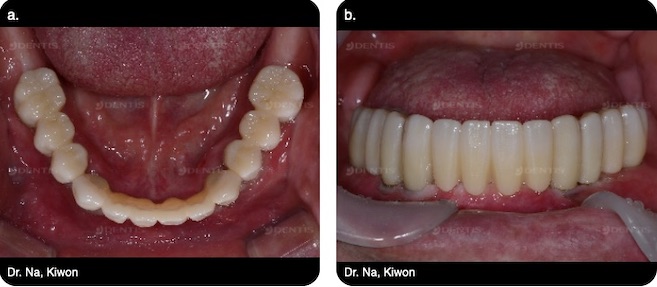
Fig. 23a-b.
3-segmented, cement-retained full zirconia final prostheses were delivered.
Fig. 24.
Post-op 4 month panorama.
Fig. 25.
Post-op 8 month panorama.
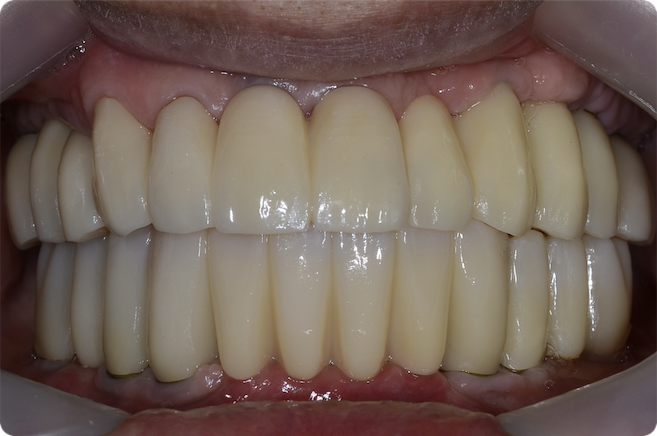
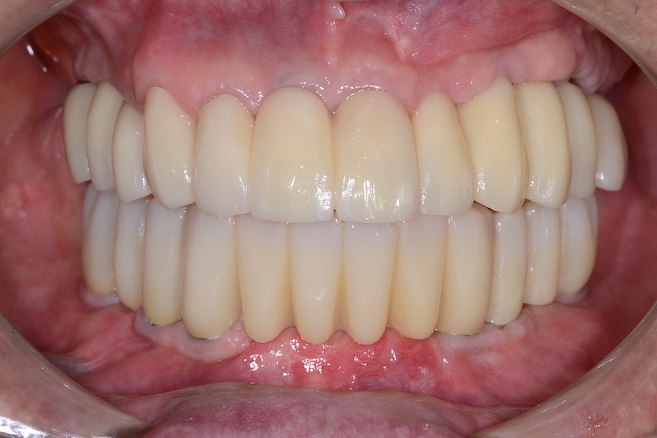
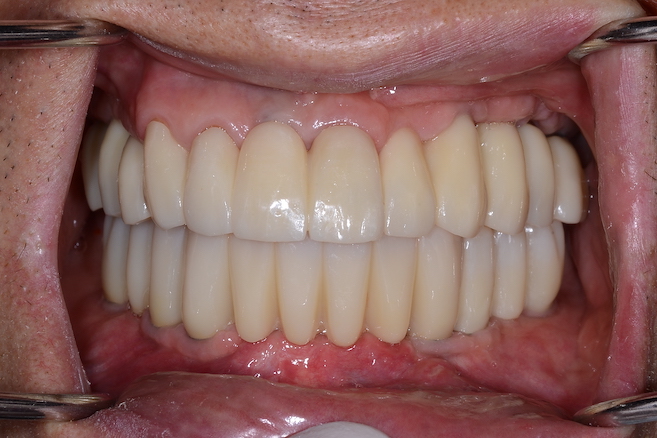
Fig. 26.
Post-op 11 months clinical view.
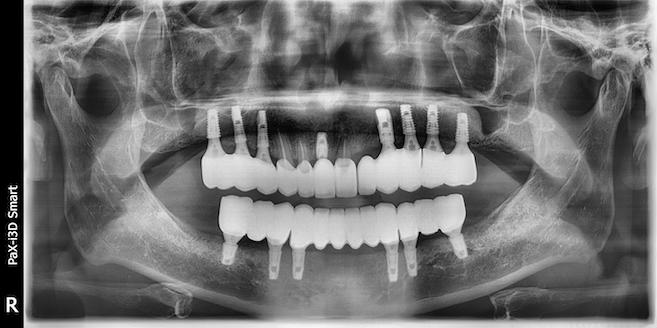
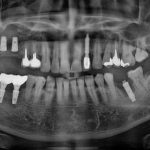
Fig. 27.
Post-op 11 months panorama. There was no abnormal sign.
Fig. 28.
Post-op 18 months clinical view.
Fig. 29.
Post-op 28 months clinical view.
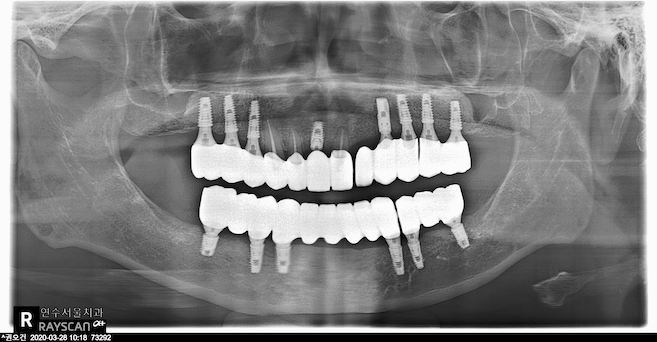
Fig. 30.
Post-op 28 months panorama.
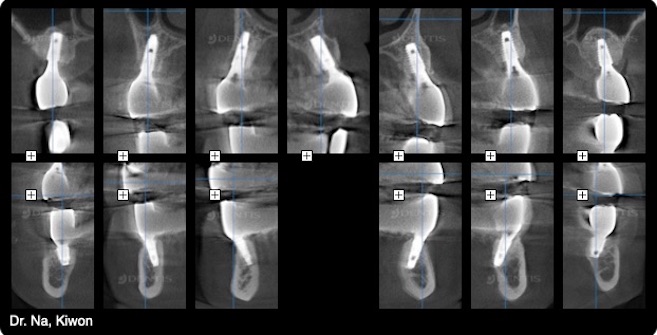
Fig. 31.
Post-op 28 months CBCT. There was no change in bone around fixtures.
The copyright of this clinical data belongs to Dr. Na, Kiwon in Yeonsu Seoul Dental Clinic. Please note that the copyright of this card news and the right of use belongs to DENTIS Co., Ltd, GDIA, and Dental Bean.